Decode the Decoding in Tabby

In the context of the Transformer model, which is widely used across LLMs, decoding refers to the process of generating an output sequence from an encoded input. Tabby recently implemented incremental decoding as part of the greedy search. This blog will explain our thoughts behind this 🛠️💡.
Common Decoding Methods
Here's an example to facilitate understanding different decoding methods:
Let's say a developer starts to write a list comprehension in Python to get even numbers from a list:
numbers = [1, 2, 3, 4, 5]
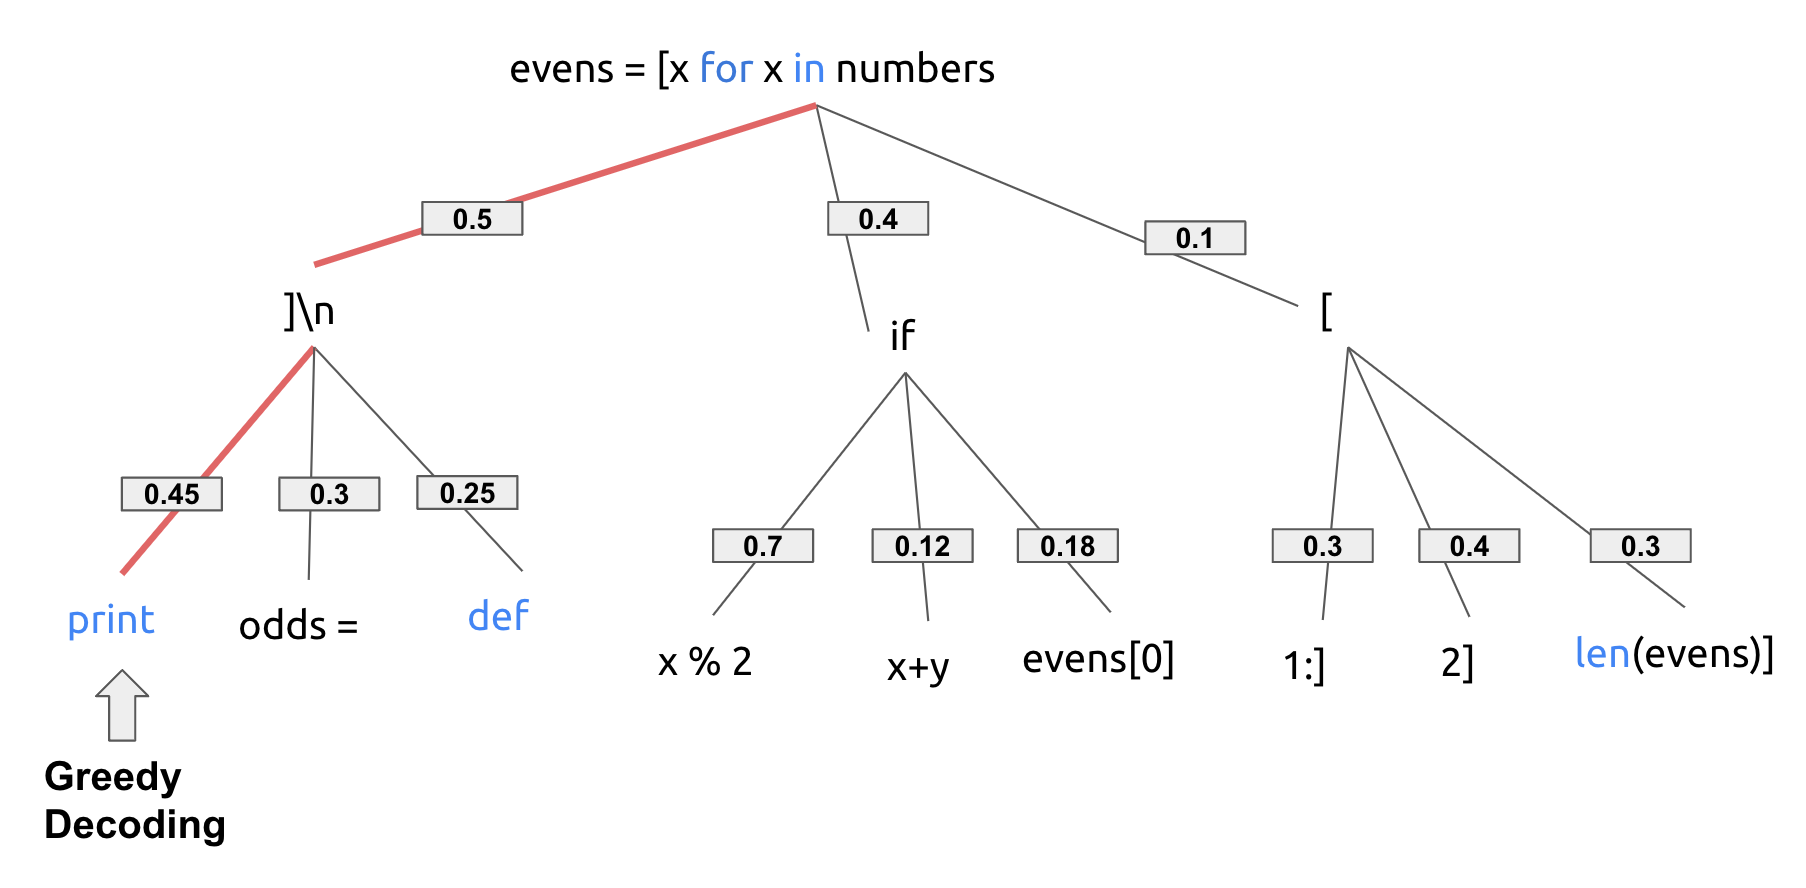
evens = [x for x in numbers
To simplify the scenario, we assume that the language model maintains a probability distribution as shown below,
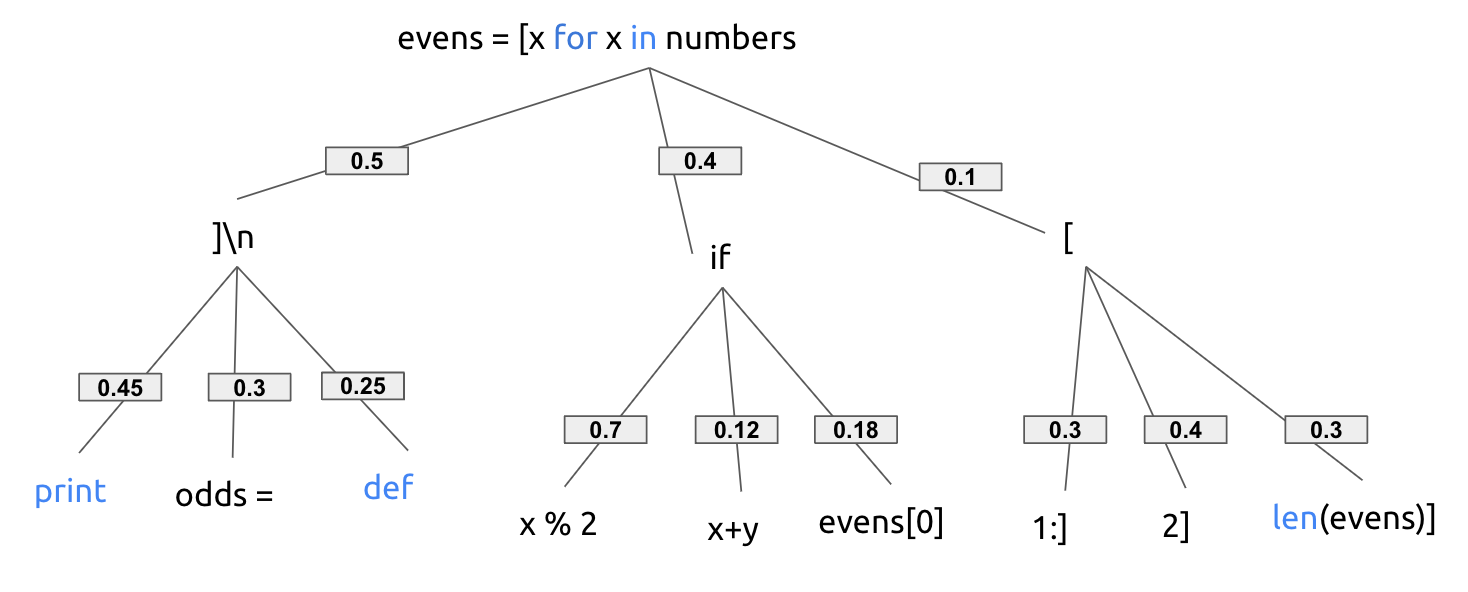
Here's how different decoding methods might suggest 🔍:
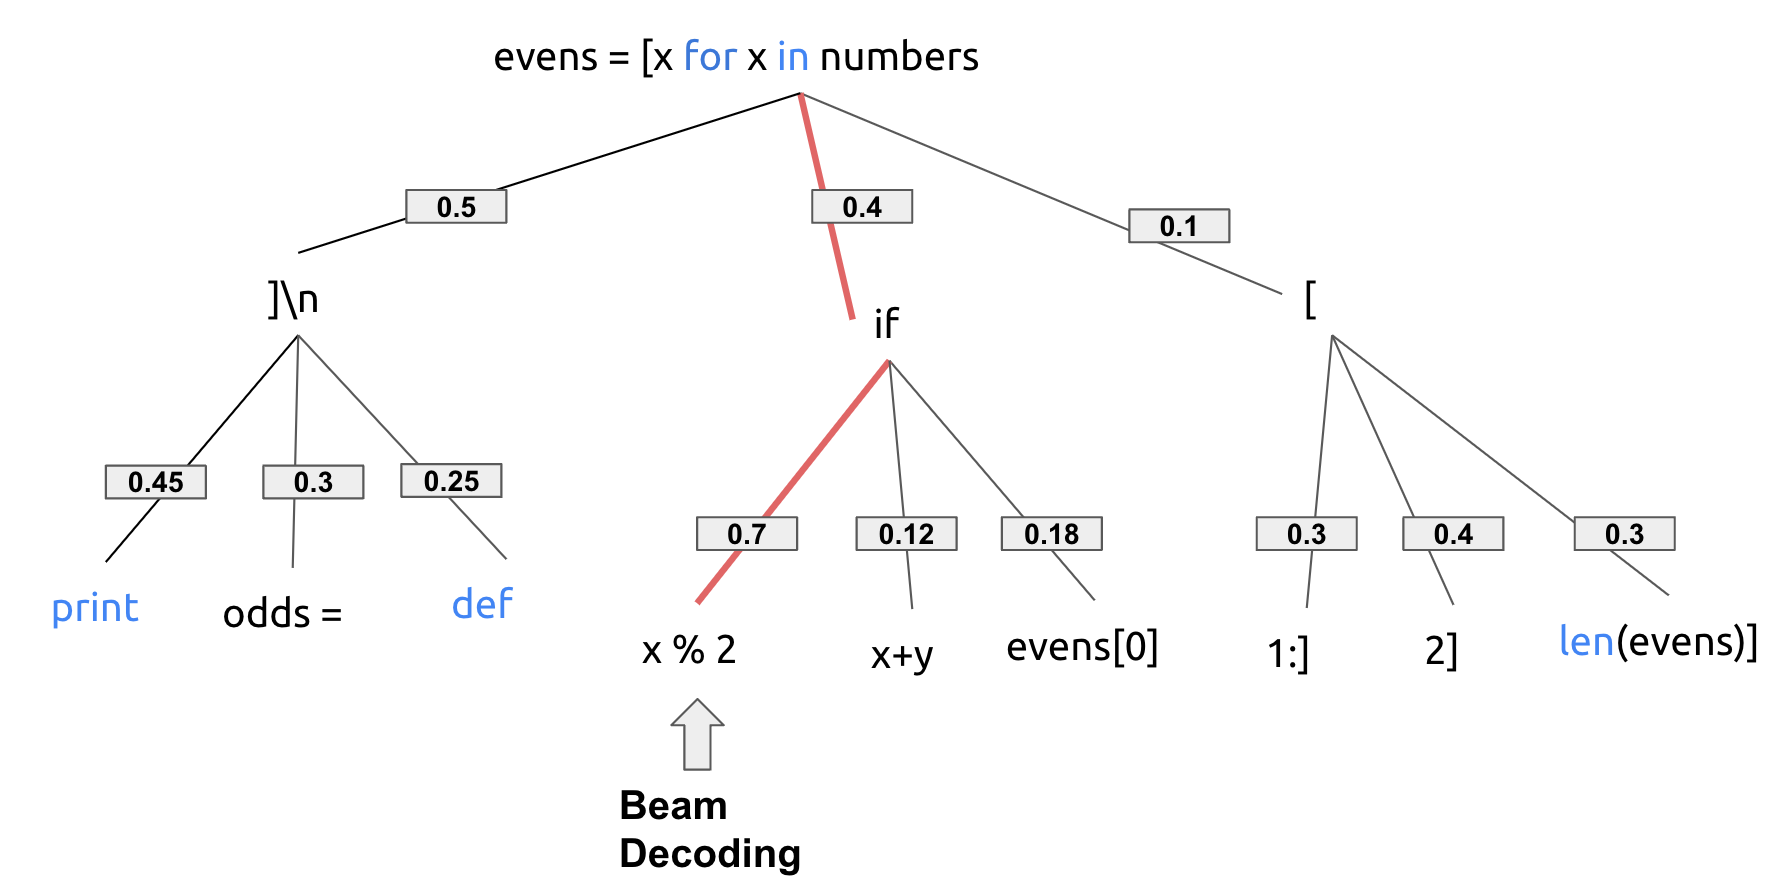
Beam Search 🌈
Beam search maintains multiple possible sequences (beams) of active candidates at each time step. By increasing the beam size, the decoding performance can increase at the expense of higher computation cost.
Assuming num_beams=2, in this case, it'll produce if x % 2, as 0.4 * 0.7 = 0.28 gives the highest probability when considering a sequence of 2.
Greedy Decoding 🏆
Greedy decoding selects the most probable next token at each step, which is most intuitive method but can sometimes lead to sub-optimal sequences. This is because it only considers one token at a time and makes such choice greedily.
In this particular case, greedy decoding would complete the code with ]\n print as each of the token here has maximum probability given the chosen token before.
Sampling-based methods 🎲
The two methods above always produce deterministic results given the language model probability distribution. Often times this isn't the ideal case, especially in conversational scenarios where users often retry to expect an alternative answer (or think about language translation). Alternatively, sampling-based methods like random sampling, top-k, and top-p sampling introduce randomness to achieve diverse outputs.
However, as it's now an undeterministic approach, sometimes the models could generate incoherent gibberish results. There are many different sampling methods to sharp the distribution or redistribute the probability mass to ensure higher chance of generating meaningful tasks. Here we also want to emphasize that in practical implementations, sampling-based methods are often applied on top of beam search or greedy decoding to combine the best of both worlds.
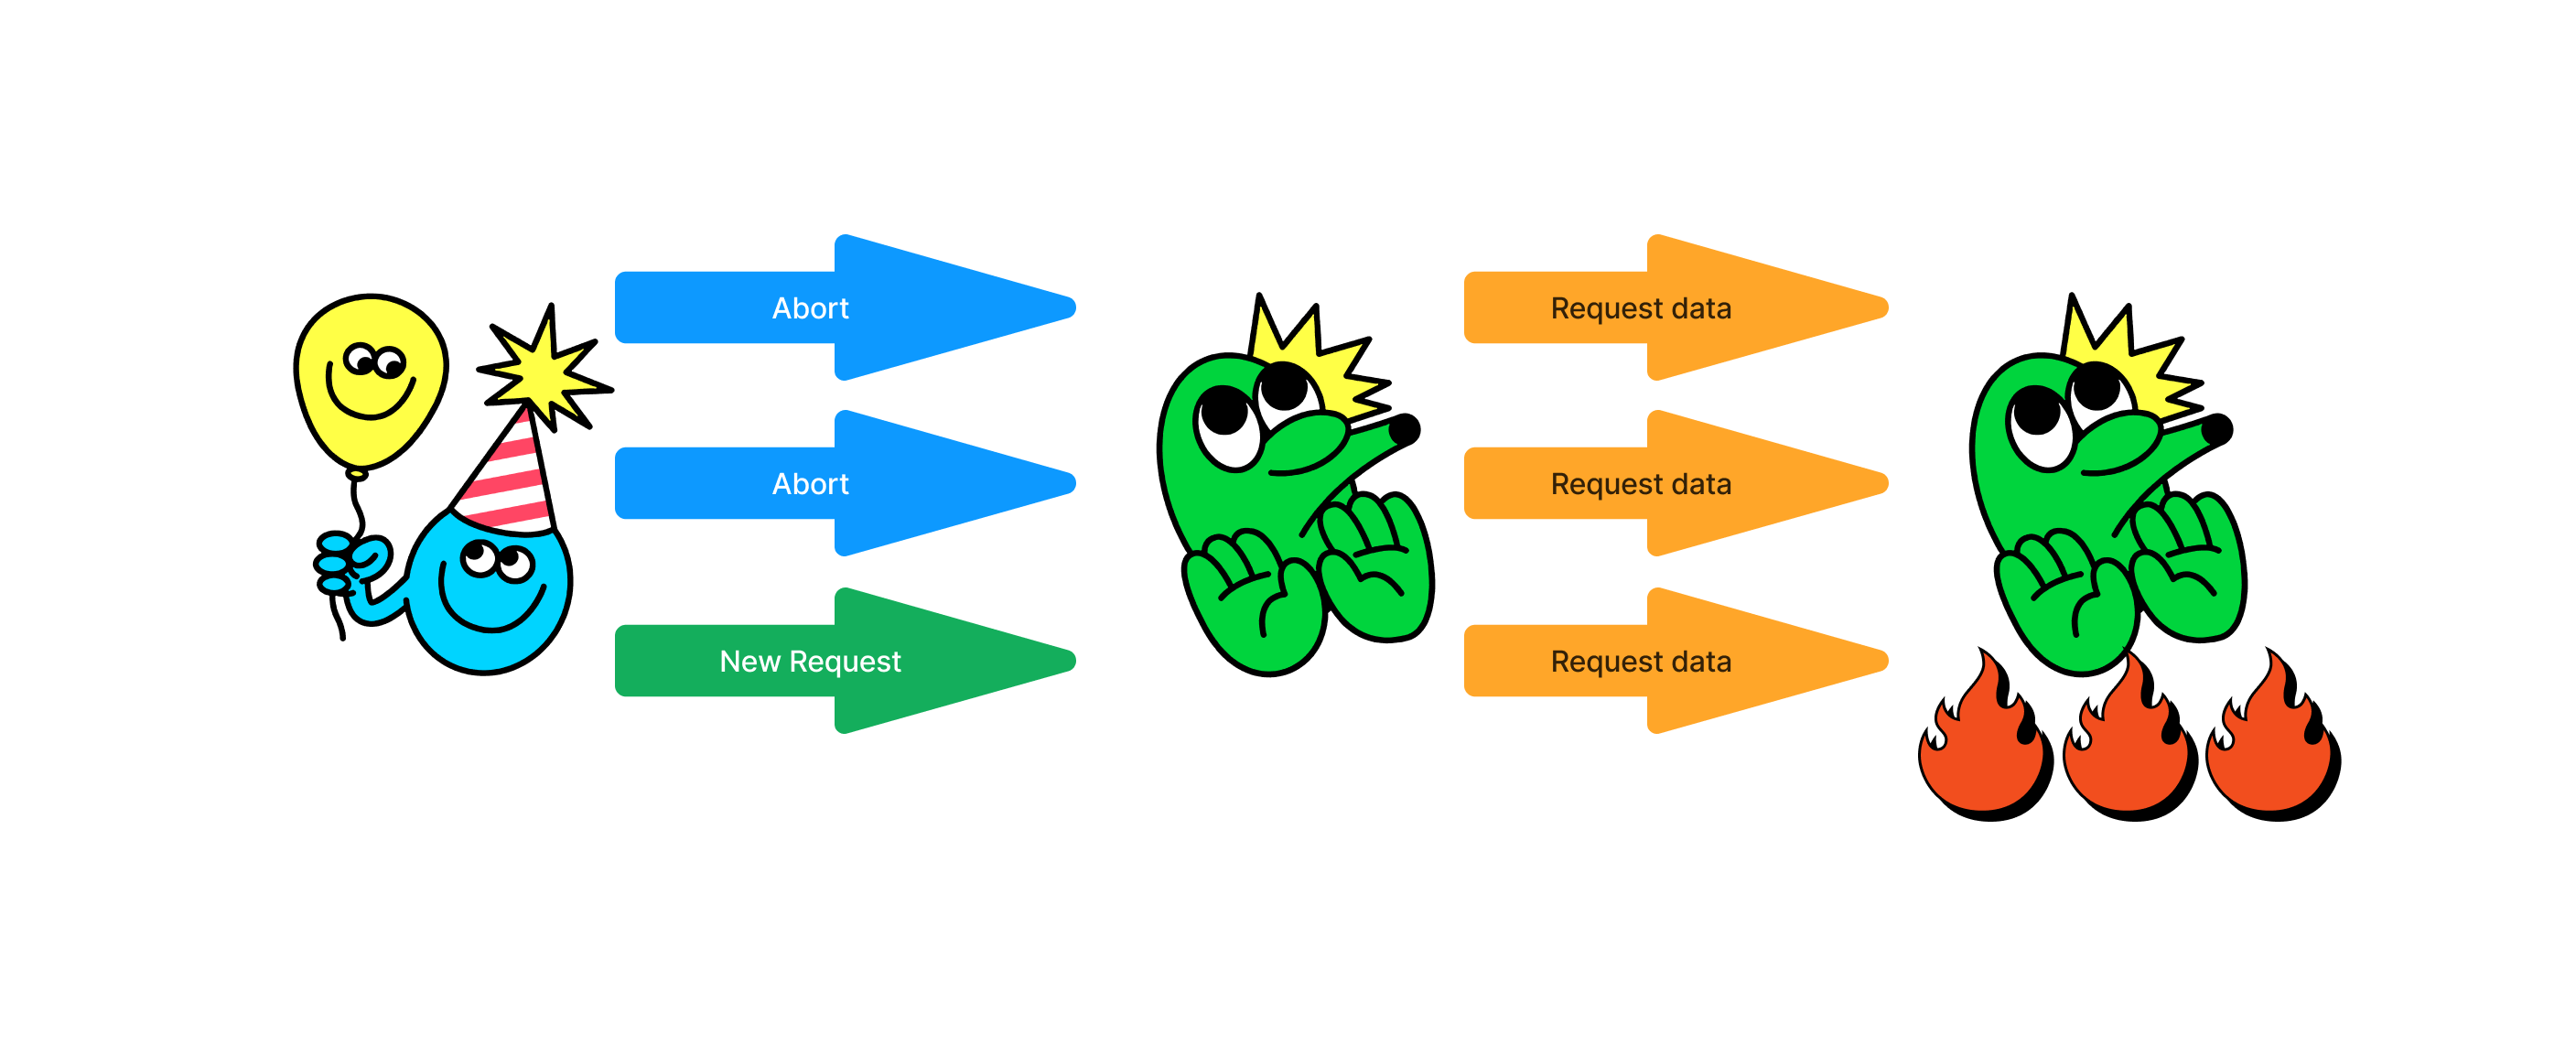
Era of Streaming for LLM
Latency is key in user experience for many LLM applications. In order to minimize the idle time for users, streaming response is commonly adopted. In LLM streaming, we start decoding the response as soon as it's available, instead of waiting for the entire response to be returned.
Considering streaming process in LLM decoding, although greedy decoding often produces sub-optimal results compared to beam decoding or sampling-based methods, it wins with its fast and parallelizable computation. Most LLM applications today (e.g. ChatGPT, Bard, Anthropic, etc.) have adopted greedy decoding with certain samplings and carefully tuned them for different tasks: creative tasks such as chatbots or writing articles receives diverse responses from samplings; input-grounded tasks such as translation or coding benefit from greedy decoding to get the immediate "correct" result. (Indeed, ⌨️ coding tasks emphasize more on the consistency with given context - lines of code you just wrote, than the variations of possible responses.😆)
Incremental Decoding ⏩
However, often times decoding a sequence of tokens one-by-one without considering previous decoded results could produce undesired results. For example,
Decoding first token:                ......, 211       ->   "......[ llo]"
Indepently decoding the next token:  ......, 207, 211  ->   "......[ he][ llo]"
In the case above, the final decoded string would be " he llo" with an awkward space in between. To resolve issues like this, we could cache the already-decoded prefix and append it to the current token to decode together. It is the core idea of incremental decoding to take the prefix token into consideration for decoding current tokens. With incremental decoding, we get the desired result for the example above:
Incremental decoding: ......, 207, 211 -> "......[ hello]" ✅
For interested folks, you can refer to Tabby's exact implementation in IncrementalDecoding function in creates/tabby-inference/src/decoding.rs.
Have you found our new decoding methods effective? Share your thoughts with us in our Slack channel 🌍😊!

 Credit: